| |

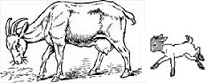
BUCKS
- A buck can breed year around. A well-conditioned healthy buck can breed between 40 – 50 does in a single breeding season.
- When a buck's instinct to breed is at its strongest, it is call "rut".
- He will produce a musky odor, urinate on his face, beard, and front legs.
- Bucks frequently stop eating (or reduce the amount they eat) while in rut and/or breeding.
- It is important that the buck is getting enough good nutrition and is well conditioned before breeding begins.
- Be sure to feed him grain so that he maintains energy.
- Bucks are most temperamental when they are in rut. Some bucks may become aggressive during this time.
- However, an overly aggressive Fainting Goat buck is not normal; they are usually mild mannered whether in rut or not.
- You just need to be aware of this potential and respect their hormones (and their horns).
- It is sometimes best to just leave them alone until their rut or breeding is over.

DOES
Before breeding:
- It is best to allow a Fainting Goat doe to mature to between 12 and 18 months before her first breeding.
- Worm to insure that she is free of internal parasites.
- Trim hooves. Once the doe becomes heavy with kids, it will be too uncomfortable for her to balance on three legs to have her hooves trimmed.
- Watch the doe for her heat cycle (estrus, also known as "in heat" or "in season"). Observe the doe twice daily for 15-20 minutes in the early morning and late afternoon. Do not observe doe while feeding or doing chores.
- Estrus cycles occurs every three weeks (every 16-24 days, but most are between 19-21 days apart).
- Signs of estrus, indicating her interest in breeding, include by wagging her tail rapidly for the buck ("flagging"), vocalizing (“baaing”), frequent urination, reduced appetite, nervousness, increased activity, may mount or fight with others, and a general attitude change.
- Keep accurate records. Keep track of time of heat, length of heat, and length of time between heat periods.
- A doe’s heat cycle can last from 12 – 72 hours (1 - 3 days).
- Ovulation usually occurs 12 to 36 hours from the onset of standing heat.
- Does do not usually go off feed during breeding to the extent that bucks do, but it is important that their nutritional needs are addressed prior to breeding.
- The condition of the doe at breeding time has a huge impact on the resulting offspring. That said, do not get them fat; fat does may not breed at all and tend to have complications during delivery. A nicely balanced doe is desired (not thin, but not over weight).
After breeding:
- The gestation period (the length of time it takes for the kid to develop inside the doe) is 150 days. However, the actual birth usually comes between 145 to 155 days (5 months).
- It is important that the doe has a balanced nutritional diet during her pregnancy. However, do not over feed her. An overweight doe can have complications during pregnancy.
3-4 weeks before kidding:
- In Selenium deficient areas give Selenium/Vitamin E shot 4 weeks before kidding.
- Give CD&T vaccination 3-4 weeks before due date, 2cc Subcutaneous (SQ, sub-Q, SC) - Given under the skin just behind the shoulder. This will give the kids some immunity prior to their birth.
|
|
| |
Kidding time:
Always remember to clip you fingernails short (filing to make sure there are no sharp edges) and remove jewelry in case you need to assist the doe.
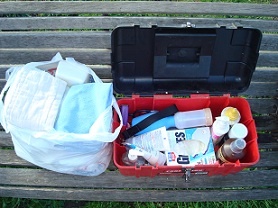
Birthing Kit:
Have your birthing kit ready before the doe is due to deliver. It is never fun running around collecting items after the doe has already started pushing.
The following items are recommended for your birth kit:
Minimum kit
- Gloves (disposable)
- Towels (cloth diapers, cut up old bath towels/kitchen towels, and veterinary towels work great)
- Lubricating gel (such as KY Jelly)
- Aspirator (infant nasal aspirators work well)
- Scissors
- Umbilical cord clamps (or dental floss, thin string to tie off an umbilical cord if necessary)
- Iodine (Betadine or generic)
- Umbilical cord dipping cup (medicine measuring cups work great)
- Nutri-drench (or something similar for weak kids - Goatade, BoSe, etc.)
- Emergency phone numbers (eg, your veterinarian's number and an experienced breeder's number in case you can't reach your veterinarian).
- A printed page or book that shows different birthing positions, so if you have problems it will be easier to figure out how to assist the doe.
Other items many breeders keep in their kits or on hand
- Colostrum/Milk Replacer (keep on hand just in case bottle feeding is necessary)
- Bottles & Nipples
- Syringes (in case kid is too weak to nurse)/Kid feeding tube
- Thermometer
- Stethoscope
- Kid jackets or heating pads
- Disposable puppy training pads or surgical drapes (to put under the doe's rear when they are kidding)
- Goat Kid Respirator
- Scalpel, needle, and thread (for those more experienced breeders who can cut the vulva to make room for a head too large to come out without tearing the vulva)
Preparing the doe for kidding:
Some breeders will shave the doe's udder, tail, and vaginal area. Although this is not required, it can have the following advantages:
- It's helpful in keeping an eye on her changing body (udder & tail head) and will help you determine when she starts going into labor.
- It also makes it easier to clean her up after the birth,
- Right before delivery you can also rub the vulva area with vasoline as this will help with the clean-up.
- Shaving the udders helps make it easier for the new born kids to find her teats and nurse.
Kidding day:
Signs of labor:
- Signs of labor can be different for every doe. So it is important to keep notes on how your doe behaves.
- It is important to start watching your doe several weeks before kidding to learn her natural behaviors.
- Watch quietly from a distance for about 15 to 20 minutes a day. You want to observe her behavior without your behavior disturbing her. Do not watch during feeding time.
- One of the first signs of early labor is a behavioral change. They may stand off by themselves, or become friendly when they were standoffish, or become standoffish when they were friendly.
- Nesting is also an early sign. They will paw the ground a lot.
- They will also lay down and get back up often (frequently switching sides as they do so).
- Many times the doe will begin talking softly to her belly.
Signs that kidding is coming soon (normal delivery):
|
|
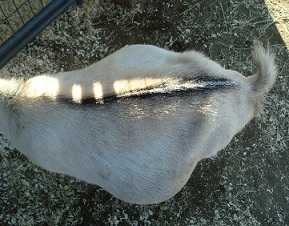
Ligaments Soften

- Just above the tail head (on either side of the spine), you will feel ligaments which feel like pencils in the rump.
- As labor approaches, these ligaments will soften, giving the rump a concaved look.
- When the ligaments "are gone", you will be able to almost touch your thumb and forefinger together encircling the spine.
|
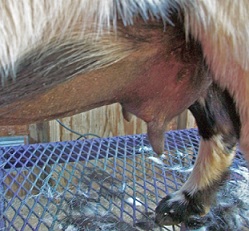
Kids Drop
- Kids are usually carried up high towards the back.
- As the doe comes closer to labor, her kids drop down giving her a "pear" shape.
- This "dropping" allows the kids to get positioned for kidding.
- The doe's hip bones will protrude.
|
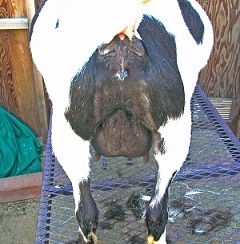
Bagging Up
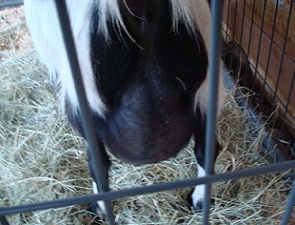
- The doe's udder will fill with colostrum as kidding nears.
- The udder will begin to "bulge out" and become very tight with a "shiny" appearance to it.
|
Mucus String
- Right before hard labor the doe will start stringing mucus.
|
Signs of Labor
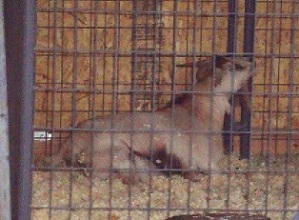
- This is a common pose for a doe in labor.
|
The Far Away Look
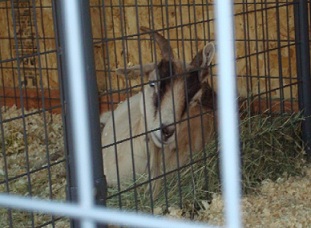
- When a doe is near kidding, they will begin to stare off into space.
|
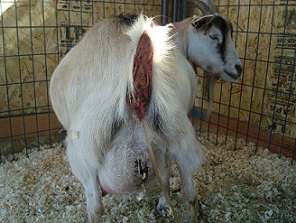
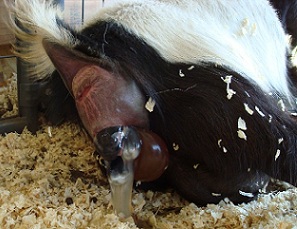
Passing through the Birth Canal
- As the doe begins to push, you will start to see the vulva bulge as the amniotic sac and its contents pass through the birth canal and work there way to the vulva.
- The amniotic sac and its contents provide a liquid that surrounds and cushions the baby (fetus). It allows the fetus to move freely within the walls of the uterus.
- The amniotic sac is connected to the yolk sac, to the allantois and, through the umbilical cord, to the placenta.
|
Amniotic Sac
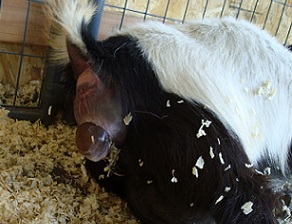
- The amniotic sac consists of two membranes.
- The inner membrane, the amnion, contains the amniotic fluid and the fetus.
- The outer membrane, the chorion, contains the amnion and is part of the placenta.
- The chorion usually passes first. Sometimes is will break ("her water broke"), while other times it doesn't (as seen in the photo above. In our house, this is known as "passing the bubble".
|
Hooves and Nose Presentation
- Kids will usually present themselves with their front hooves first followed by the nose.
- Passing the crown of the head is the hardest part for the doe.
- Once the head is passed, the kid slips out easily.
|
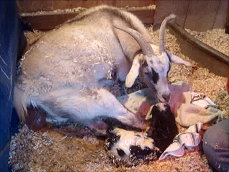
A Baby is Born
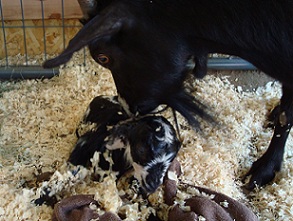
- Once the kid is born, use a towel to free the mouth and nose of the amniotic sac.
- Use an aspirator to help clear the mouth of amniotic fluid.
- Allow the dam to clean the kid to help form the bond between the doe and her kid.
- It's okay to finish helping the doe dry the kid after the bond has been established.
|
Passing the Placenta

- After the kids are born, the doe will pass the placenta.
- The start of the placenta will often appear as if another amniotic sac is being passed. It will often contain dark contents and even some white debris that makes it appear as if another kid may be in it. You will know that it is the start of the placenta because the contents will have fluidity to it instead of being a kid.
|
The Placenta
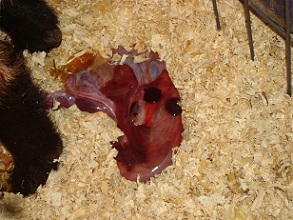
- The placenta is the vascular structure in the uterus that provides oxygen and nutrients for the fetus and transfers wastes away from it.
- It can take a few hours to 24 hours for the placenta to detach from the uterus.
- Don't ever pull the placenta. Postpartum hemorrhage can occur if the blood vessels supplying the placenta during pregnancy are severed when the placenta separates from the wall of the uterus.
|
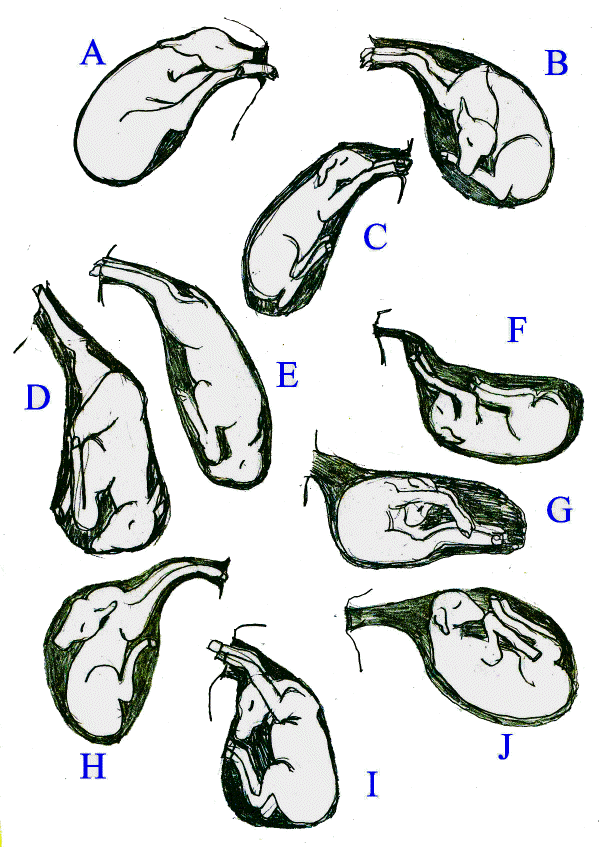 |
A. |
Anterior position; hind legs in the pelvic canal. Hind legs must be pushed back out of the canal while maintaining traction on the forelegs. Once back legs are pushed back, delivery will occur in the normal position (C). |
| B. |
Anterior position with head and neck to one side. Head must be brought forward and into the pelvic canal. This is a difficult birth so be patient. Once head is straightened and in the pelvic canal, delivery will occur in the normal position (C). |
| C. |
Normal anterior birthing position. Two front legs followed by the nose. |
| D. |
Breech position with one rear leg retained. Push forward on the leg presented and bring the retained leg into position by hooking a finger in front of the thigh and gently pulling the rear leg towards you. Deliver in the breech position (E). |
| E. |
Breech position. This is a common position, especially in cases of triplets. This position can be delivered just fine, but may need to be pulled. |
| F. |
Anterior position with fetus upside down. Rotate 180 degrees and delivery will occur in the normal position (C). |
| G. |
Back presenting. This is a very difficult malposition to deal with due to the lack of space to manuever. Care must be taken not to push the legs through the uterine wall when manuevering the kid. Use fingers to roll kid until you can get the kid in either an anterior or a breech position. Once in anterior or breech, determine its new position (A-J) and then see A-J for what to do next. |
| H. |
Front legs presenting, but head is back. Push front legs back to get room and then bring the head into position. Delivery will occur in the normal position (C). |
| I. |
Front legs presenting, but head down ventrally. Push head and shoulders back and bring nose up into position. Delivery will occur in the normal position (C). |
| J. |
Head and legs flexed and upside down. Rotate 180 degrees, bring head and front legs into pelvic canal. Delivery will occur in the normal position (C). |
Tips on How to Help Weak Kids

|